One good reason to store copies of your important records on DVDs. The Guide of DVDAid ,
A DVD has a life span between 20 and 100 years, and that’s one good reason to store copies of your important records on DVDs. Some things are priceless: Photos of a smiling college graduate or a homemade video of a tiny kitten, an enormous dog and a parrot with an attitude that collects a million hits on YouTube. Some things stored as digital data that would never go viral may actually be much more valuable than many people realize. Digital copies of important documents–such as financial records and family milestones–are not typically considered premium content in the same way that blockbuster movies are. Yet, if those digital family heirlooms are damaged in a fire or flood, the loss may be irreplaceable.
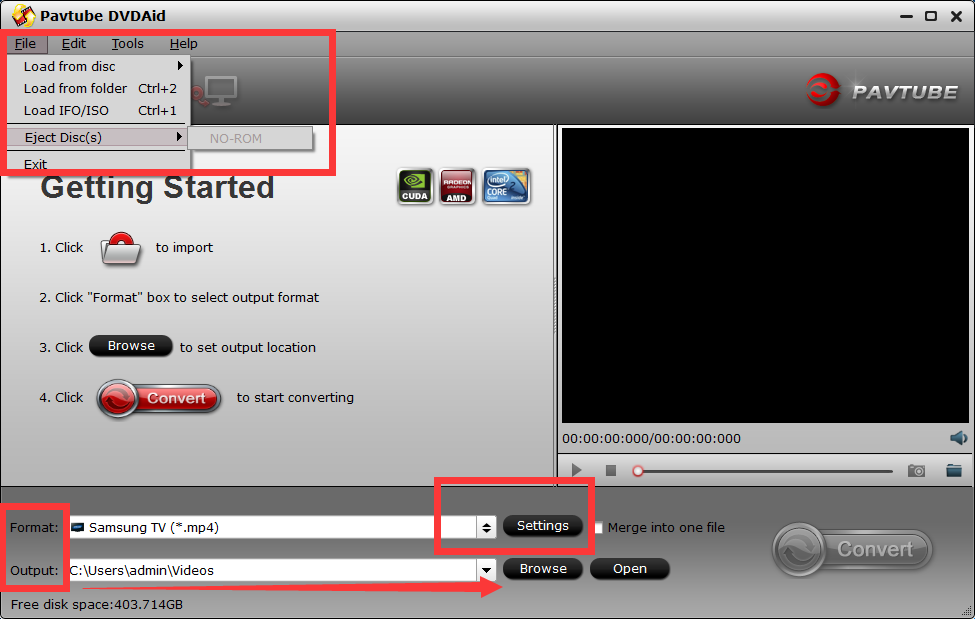
Step 1. Run Pavtube DVD Ripper and import DVD movie.
Install Pavtube DVDAid and run the software. To load DVD, DVD-ROM is required. Click on “DVD ROM” and the software will import DVD movie from the optical drive and arrange them as a directory in file list. You can check any of the episodes and view them in the preview window. Taking snapshots can be done by one click on Snapshoot button when previewing. You can load DVD folder or DVD ISO/IFO image file in the same way by clicking on “DVD folder”or “IFO/ISO”.
Tips: You should choose to copy DVD with forced subtitle.
 Step 3. Set output format and destination.
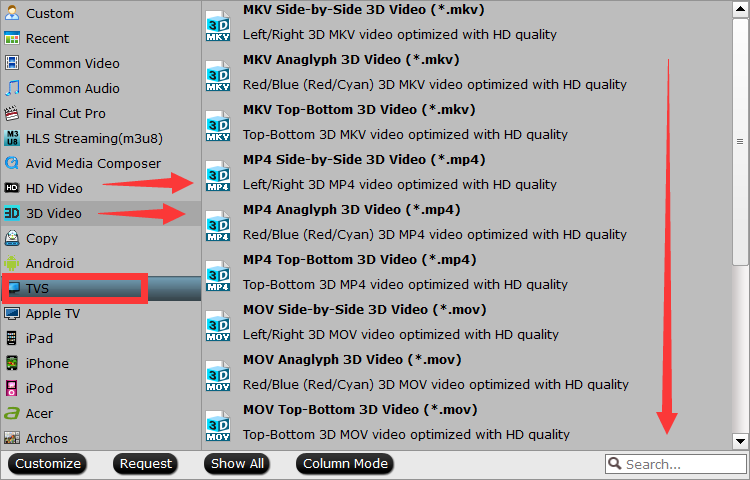
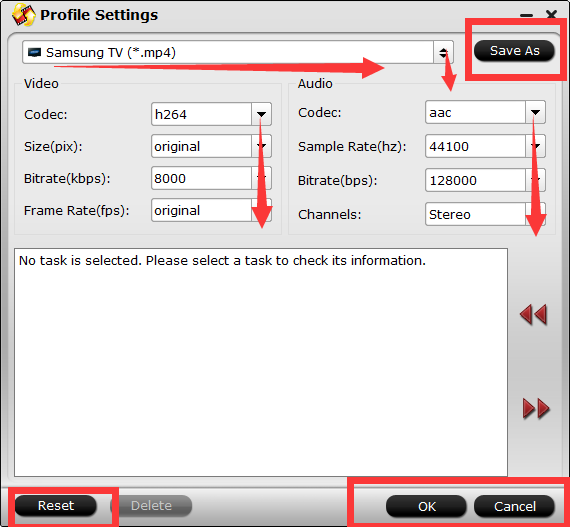
Click on the format bar and there are various output formats for you to choose from. Apart from common video, audio, HD video, Flash video, there are customized formats for portable devices such as iPad, iPhone, PSP, Blackberry, Nokia, Zune, Creative Zen, Smart TV, VR Headset, Archos and video game consoles. In output path box you can set output destination. To further customize output audio and video parameter, you may click “Settings” button.
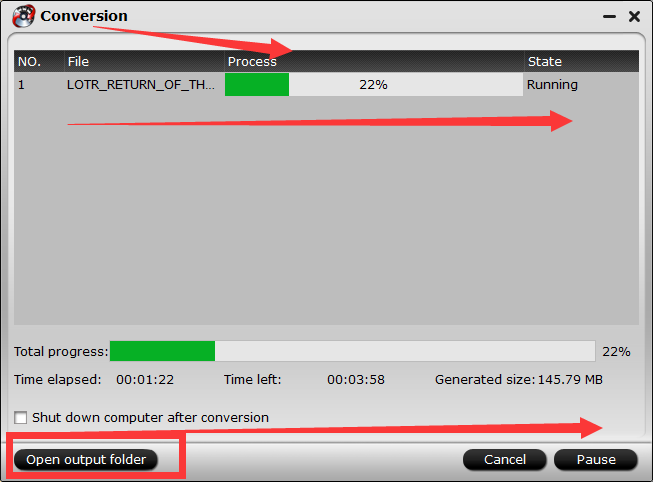
Step 4. Copy DVD to specified video format
Simply click on “Convert” button to start ripping. You can view the progress information and cancel it halfway. You could set auto shutdown as well.